How to Hold a Crochet Hook and Yarn (Plus Tension Tips)
Learning how to hold crochet hook and yarn is the very first skill every beginner crocheter needs. Before you can make a single chain, your hands need a comfortable, repeatable way to hold the hook and feed the yarn.
The good news is that there is no single “correct” way to do it. This calm, step-by-step guide will walk you through both hook grips, a simple yarn-wrapping method for steady tension, and how to fix tension that is too tight or too loose.
Quick answer: There are two main grips: the pencil hold (hook held from underneath like a pen, controlled with your fingers) and the knife hold (hand over the top of the hook like a dinner knife, driven by the wrist). Hold the working yarn in your other hand, draped over your index finger, to keep the tension even.
In This Guide
- The Two Hook Grips: Pencil Hold vs Knife Hold
- How to Hold the Yarn for Tension
- Tension Troubleshooting: Too Tight vs Too Loose
- A 5-Minute Practice Drill
- A Note for Left-Handers
- Frequently Asked Questions
- Final Thoughts
- Your Next Step
Quick Facts
| Skill level | Absolute beginner — no experience needed |
| Practice time | 15 minutes |
| You will need | A crochet hook and any smooth, medium-weight yarn (see what you need to start crocheting) |
The Two Hook Grips: Pencil Hold vs Knife Hold
Every crocheter holds the hook one of two standard ways. Both grips are used by beginners and experts alike, and neither one is right or wrong — they simply use different muscles.
Pick up your hook and try each grip as you read. Notice how your hand, wrist, and fingers feel with each one.
The Pencil Hold
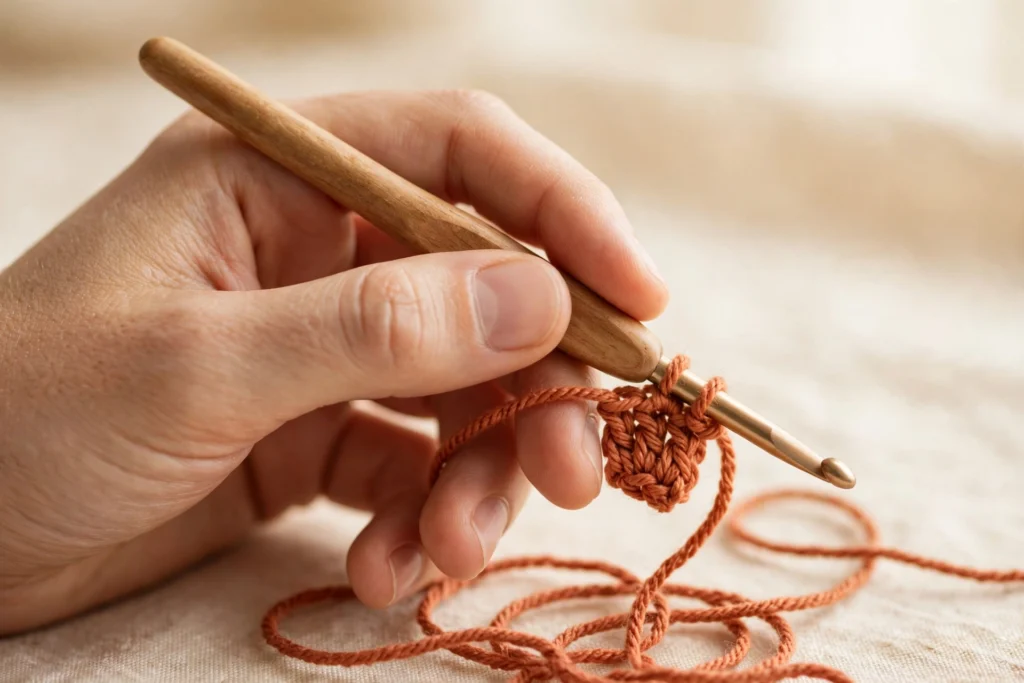
Hold the hook from underneath, exactly as you would hold a pen or pencil while writing. The hook rests between your thumb and index finger, and your middle finger braces the back of the shaft for support.
The motion comes mainly from your fingers, which gives you fine, precise control over the hook tip. Many beginners start here because the writing position already feels familiar.
The Knife Hold
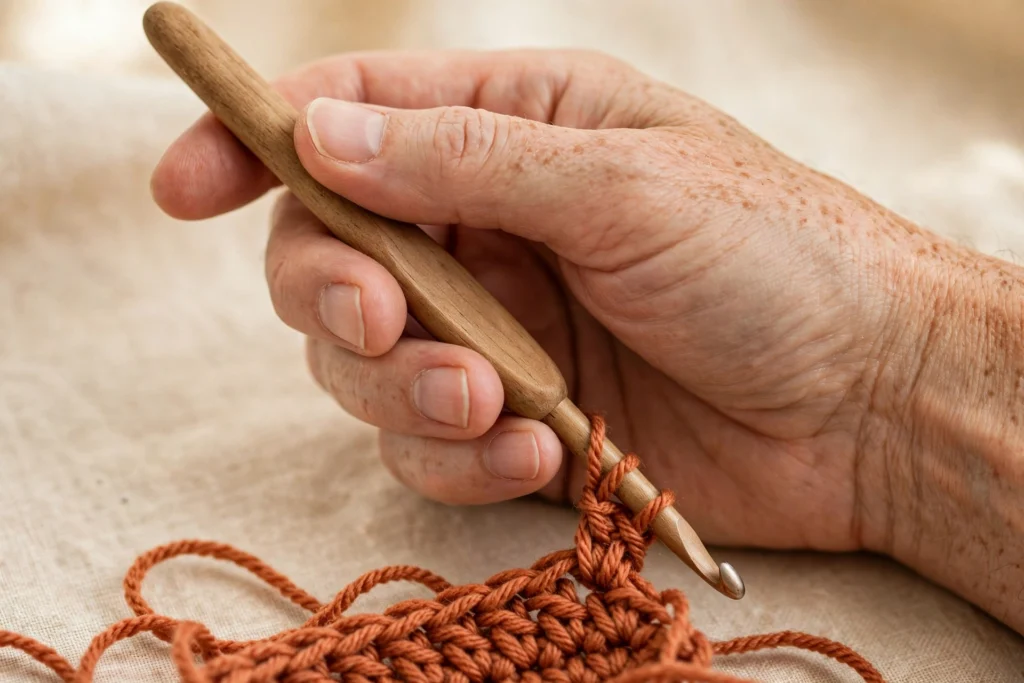
Place your hand over the top of the hook, the way you would hold a dinner knife when cutting food. Rest your thumb on the hook’s flat thumb rest, and let your index finger extend along the top or side of the shaft to guide it.
The motion comes mostly from your wrist and arm, which gives you steady leverage and momentum. Some crocheters find this grip feels more powerful and causes less hand strain during longer sessions.
For illustrated examples of both grips, see Yarnspirations’ beginner’s guide to holding the hook and yarn.
Pencil Hold vs Knife Hold at a Glance
| Pencil Hold | Knife Hold | |
|---|---|---|
| How to hold | Hook sits under your hand, pinched between thumb and index finger like a pen; middle finger braces the shaft. | Hand rests over the top of the hook, thumb on the thumb rest like a dinner knife; index finger guides the shaft. |
| Feels like | Writing or drawing — light, precise, and driven by the fingers. | Cutting food — steady, powerful, and driven by the wrist and arm. |
| Best for | Delicate or lacy work, smaller hooks, and anyone who finds a writing-like hold natural. | Dense projects such as amigurumi, longer ergonomic hooks, and longer stitching sessions. |
Which Grip Should You Pick?
Either one is fine — comfort wins. Spend a few minutes with each grip and pay attention to which one lets your hand stay soft and relaxed.
If one grip makes your fingers ache or your stitches uneven, try the other. Many crocheters switch grips for different projects, so learning both now gives you options later. The key to a comfortable grip is choosing the one that lets your hand stay soft and relaxed.
How to Hold the Yarn for Tension
Your non-hook hand has two jobs: it steadies your work and controls the yarn. The way you wrap the yarn through your fingers sets your tension, so it is worth learning deliberately.
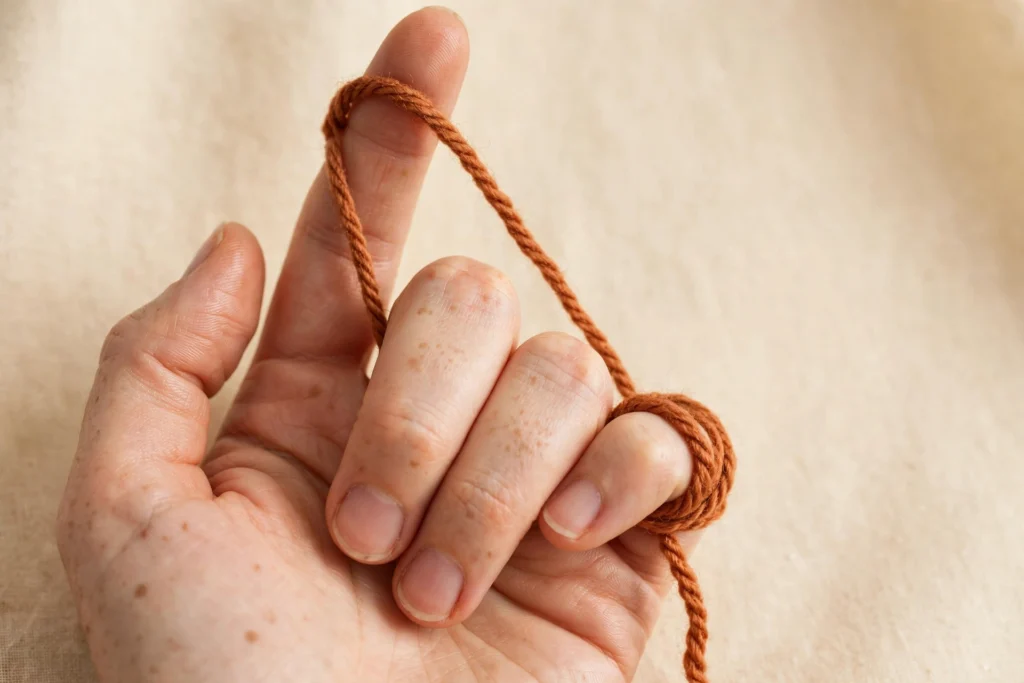
- Start with the working yarn. Hold the hook in your dominant hand. With your other hand, pick up the working yarn — the strand coming from the ball, not the cut tail.
- Drape the yarn over your index finger. Lay the strand across the top of your index finger, running from the ball toward your work. This finger is your tension dial.
- Weave it through your fingers. Bring the yarn under your middle finger, then loop it once around your pinky finger. This extra contact creates gentle friction that keeps your stitches even.
- Pinch your work. Hold the start of your work — or the slip knot — between the thumb and middle finger of your yarn hand. Your index finger stays free to guide the yarn.
- Set the height. Keep your index finger about an inch above your work. Lift it slightly to let the yarn flow more loosely, or lower it to add a little more resistance.
Wrap options: Some crocheters wrap the yarn twice around the pinky for extra tension, while others skip the pinky wrap and simply weave the yarn under and over their fingers. There is no single right version — the goal is always the same: a smooth, even feed of yarn into every stitch.
Why Tension Matters
Tension is simply how tightly the yarn flows as you form each stitch. Even tension gives you stitches of the same size, which keeps edges straight and sizing predictable.
Uneven tension is the most common reason a beginner’s first rows look wavy or lopsided. Fix the tension, and the stitches usually fix themselves.
Tension Troubleshooting: Too Tight vs Too Loose
If your stitches do not look right, the culprit is almost always tension. Here is how to tell which problem you have — and how to fix it.
Signs Your Tension Is Too Tight
- You can barely push the hook through your stitches.
- Your work curls inward or feels stiff, almost like cardboard.
- Your hand aches after only a few minutes of stitching.
How to fix it: First, relax your grip — most beginners clutch the hook far harder than they need to. Raise your index finger so the yarn glides more freely, and let the hook do the work instead of forcing it. If stitches are still painfully tight, practice with a hook one size larger, then return to the recommended size once your hands relax.
Signs Your Tension Is Too Loose
- Your stitches look sloppy, and your chain twists into spirals.
- There are visible gaps or holes where the fabric should be solid.
- Your project grows wider than the pattern says it should.
How to fix it: Add one more wrap of yarn around your pinky finger for extra resistance. Lower your index finger closer to the work to shorten the yarn feed. Slow down and pause briefly after each stitch so the yarn cannot race ahead of you.
It can also help to see how other crocheters manage their yarn — Moogly’s roundup of hook and yarn holds shows the wide range of methods that all work well.
Tension Checklist
Run through this quick checklist at the start of every practice session:
- ☐ My shoulders are relaxed and resting down, away from my ears.
- ☐ My hook hand holds the hook firmly, but not in a death grip.
- ☐ The yarn slides smoothly over my index finger without snagging.
- ☐ My stitches look roughly the same size as each other.
- ☐ My hand still feels comfortable after five minutes of stitching.
A 5-Minute Practice Drill
Set a timer for five minutes and make a simple practice chain — no project, no pressure. Focus only on how your hands feel, not on how the chain looks.
- Minutes 0–1: pencil hold. Make slow chain stitches with the pencil hold. Notice your fingers doing most of the work.
- Minutes 1–2: knife hold. Switch to the knife hold and chain again. Notice how your wrist takes over the motion.
- Minutes 2–3: adjust the tension. Stay with the grip that felt easier. Experiment with lifting and lowering your index finger to change how freely the yarn feeds.
- Minutes 3–4: find your rhythm. Chain at a comfortable pace and aim for stitches that look similar in size.
- Minutes 4–5: relax and finish. Shake out your hands, drop your shoulders, and chain one last row. That relaxed feeling is your target every time you pick up the hook.
Repeat this drill a few times over the coming days — you will use these same hand positions when you learn the chain stitch in our beginner’s guide. Short, relaxed sessions build muscle memory faster than one long, tense one.
A Note for Left-Handers
If you are left-handed, simply mirror everything in this guide: hold the hook in your left hand and control the yarn with your right. The grips, the wraps, and the tension principles are identical — only the hands swap.
Our left-handed crochet guide walks through the basics with mirrored instructions, so you never have to flip anything in your head.
Frequently Asked Questions
Which is better for crochet, a pencil grip or a knife grip?
Neither is objectively better. The pencil grip offers finger-level precision, while the knife grip offers wrist-driven steadiness. Try both and keep the one that still feels comfortable after ten minutes — that is the better grip for you.
What is the best way to hold a crochet hook and yarn?
Hold the hook in your dominant hand using either the pencil or the knife grip, and feed the working yarn over the index finger of your other hand. Keep both hands relaxed and let the yarn glide instead of pulling it tight.
Is it better to crochet tight or loose?
Neither extreme is ideal. Aim for even, medium tension: the hook should slide through your stitches easily, but the fabric should hold its shape. Consistency matters far more than being tight or loose.
Why does my hand hurt when I crochet?
Hand pain usually comes from gripping too tightly or hunching your shoulders. Loosen your hold, drop your shoulders, take regular breaks, and consider an ergonomic hook with a cushioned handle. If pain persists, rest and speak to a professional.
Can I switch grips later?
Yes. Many crocheters switch grips for different projects — for example, using the knife grip for dense amigurumi and the pencil grip for lace. Learning both now gives you more options later.
Final Thoughts
You now know both standard hook grips, a reliable way to wrap your yarn, and how to spot and fix tension problems. Your first rows will not be perfect, and that is completely normal — every crocheter’s early work looks uneven.
Keep your hands relaxed, practice in short sessions, and the movements will soon feel as natural as writing your name.
Your Next Step
Once your grip feels comfortable, you are ready to make your first stitches. Head to our beginner’s guide to crochet to learn the slip knot and chain stitch — and double-check you have everything with what you need to start crocheting.